Spring is in the air, our Phals are blooming, and everyone wants to post pictures of them online. So Peter asked me to write something to help people that are having trouble with the process.
Its not very hard to do, but there are so many different ways to do it, its very confusing and frustrating. There are two main steps. First you need to edit your picture for size, and then you need to get it online.
Editing
Your digital camera most likely came with photo editing software. I use Photoshop Elements. All the programs work similarly even if the names are different. Ill describe mine, and you shouldnt have much trouble figuring out yours.
 |
| Image 1 |
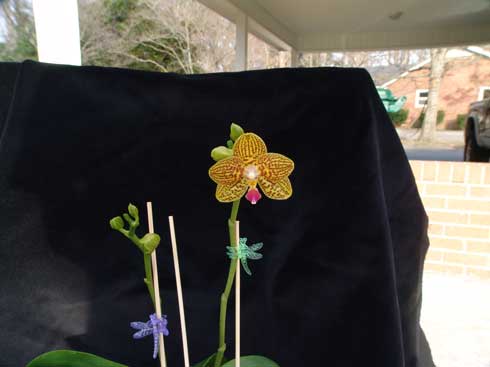
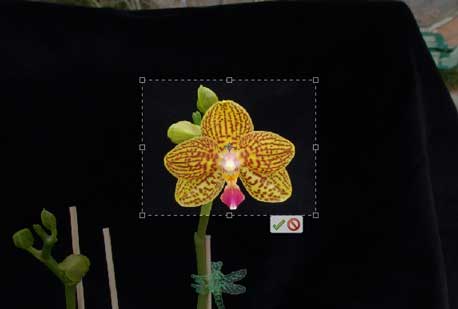
First you probably need to crop your picture. In image #1, the flower only occupies a small part of the picture. The rest is unneeded fluff, and you need to get rid of it. It takes up space, makes your flower too small to see, and no one wants to see your car port, truck, or girly dragonfly clips anyway. The crop function on any program works about the same. Just drag a box around the part you want to keep, hit enter (or click crop or whatever) and everything else goes away. See #2.
 |
| Image 2 |
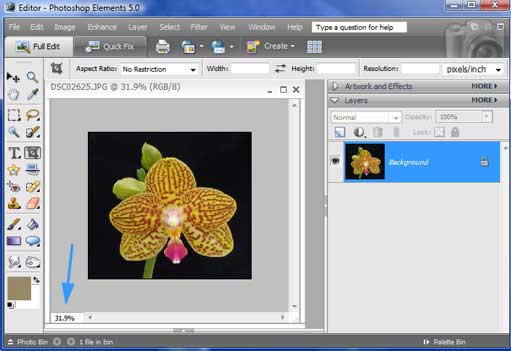
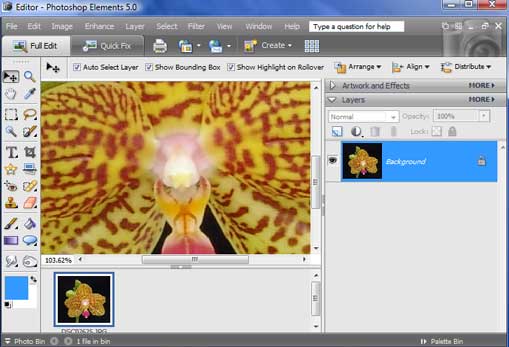
Be careful when you crop. It might look like you get the small picture you want, but youll notice in image #3 that the picture is shown at 31.9% of full size. The actual picture at full size is shown in image #4. Now you need to resize the picture.
 |
| Image 3 |
 |
| Image 4 |
In Photoshop Elements there is an image tab at the top and a resize function. However, I prefer to go to the File tab and select Save for Web. This function allows you to reduce not only the physical dimensions of the photograph, but the file size as well. Other programs will have similar functions. Large file sizes take forever to download for people with dial-up and you dont want people to have to scroll left and right because your picture does not fit on their monitor. I shoot for a width of less than 500px and a file size of less than 100K. Under 50K is even better.
Once you have done this, save your picture somewhere on your computer that you can remember. Your desktop is probably easiest. One tip, it might save you a lot of headache to save file names in letters all the same case. Youll see why later.
2. Posting your pictures
There are two main ways to post a picture.
The first is to upload it directly to the Big Leaf Forum. Use the dialog boxes at the bottom of the page (image #5) by selecting "Choose..." to find the picture file on your computer , then click on Add the file. This is great for someone that only posts a couple pictures a year, but if you are one of those crazy people that posts dozens of pics such as maybe from your trip to Redlands or the WOC, it doesnt get it. There is a limit to the size of the file you can upload and to the number of files you can have on the forum. Once you reach the limit, your older pictures will be deleted automatically.
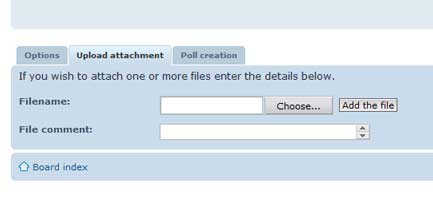 |
| Image 5 |
The other option is to load your pictures somewhere else on the Internet and use the tools in the forum to have them display there. There are mainly two places you can store your pictures on the Internet. You can use a service like Flickr or use space that is designed to hold a web page. Before I get too far I want to give you a definition. URL (sometimes pronounced Earl or called the addy) is the thing that you see at the top of your browser. It is an address or location. It tells your computer where on the Internet what you are looking for is located. http://www.bigleaforchids.com is a URL. As you know they can be more complex.
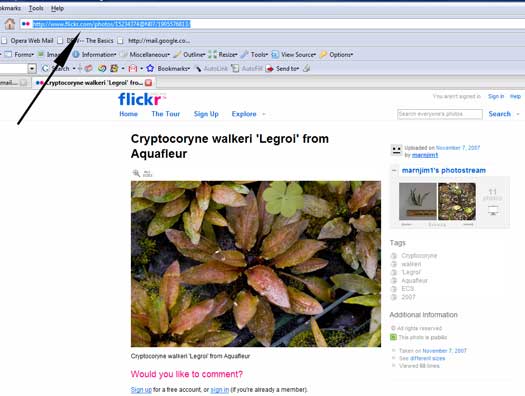
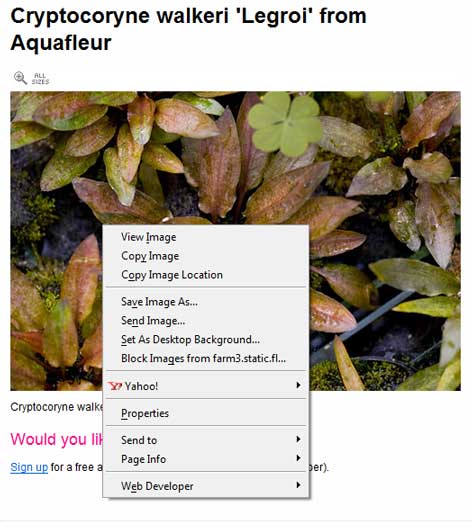
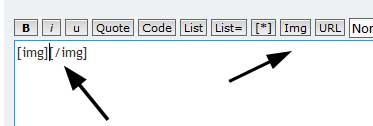
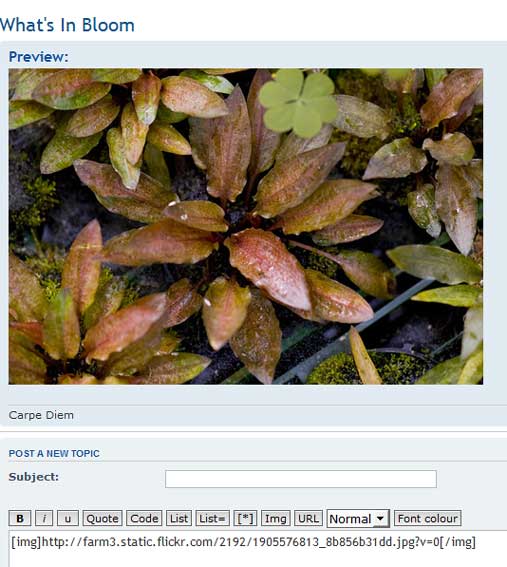
If you use a service like Flickr, you use their tools (which are probably similar to the ones to upload a picture to the Big Leaf forum) to upload your pictures. Then you go in Flickr to the picture you want to post. (Image #6) Right click on it to bring up your options, and click on Copy Image Location (Image #8) On the BL forum, open a new post or thread and click on the [img] button. [img][/img] will appear on the screen. (Image #9) Right click, and then click on paste to paste the address (URL) you copied between those brackets. (Image #10) Click preview, and your picture should display. (Image #7)
One clarification here. The URL at the top of the page like in image 6 is the URL of that page. You want the URL of the image itself (i.e. not the page). This is why you right click on the image and select "Copy Image Location." Also different browsers might say something other than "Copy Image Location" (Opera) such as "Copy Shortcut" (Internet Explorer) or "Copy Image Address" (Firefox).
 |
| Image 6 |
 |
| Image 8 |
 |
| Image 9 |
 |
| Image 10 |
 |
| Image 7 |
The other method I think is the best. Most everyone gets free web space with their Internet service provider (ISP). You can use it to make your own web page, but few people do it. You dont have to make a web page to use this space. You can simply store pictures there for display on Big Leaf. Go to the web page of your ISP and figure out how to activate your personal web space. Somewhere in the process, you should be told the URL of your page. It might be something like http://hometown.aol.com/~orchidnut/ Log into your web page and there should be a file manager which helps you upload files and make directories or folders. You use this just like you would to make folders and save files on your own computer, only you are doing it on a computer many miles away. Make a folder called orchidpics (or whatever you want), then enter that folder (probably by double clicking on it). Once you are there, there should be an "upload files" or "add files" function. Use that to find the picture files on your computer, and upload them to your web space. If the name of the file you uploaded was phal.jpg, your resulting URL in this scenario would be http://hometown.aol.com/~orchidnut/orchidpics/phal.jpg
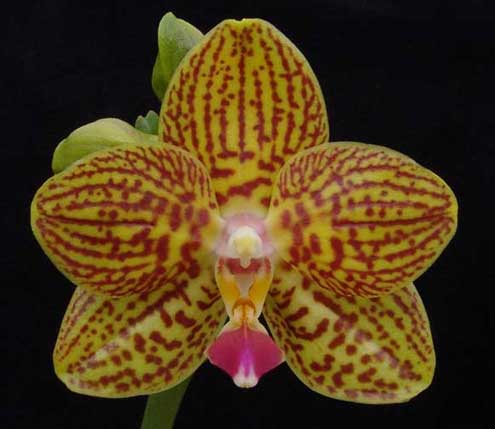
Example: Using a different picture of the Ambo Buddha above, I cropped it, reduced the physical size down from 45" x 34" to 7" x 6", and decreased the file size from almost 23 megs to 22.6K. Note: much less than 100K. I have a web page called www.benbelton.com. In that page I have a folder called "onlinepics," and in that folder I have another folder called "orchids." Inside this folder I saved the edited picture as ab.jpg. The resulting URL is http://www.benbelton.com/onlinepics/orchids/ab.jpg You can copy this URL and paste it into your browser address bar and this picture will display.
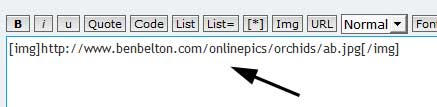
The process for getting a picture to display in the forum is the same as the picture from Flickr. Click on the [img] button and [img][/img] will appear on your screen. (Image #9) You copy and paste or type the picture URL from your web space between the brackets. (Image #10) Click on preview and your image should appear. Note: sometimes URLs are case sensitive, so if you have a camera file DSC001267.JPG and you type in dsc001267.jpg, it might not work.
 |
For the sake of brevity I skipped a lot of details. Also, it would be impossible to describe how everyones photo editing software or online services worked. Again, they are all similar. Those of you who use different program or who post a different way, please add your comments to this. If you have questions, well try to answer them. Now, show us your orchids! :-)